
最近很多新手伙伴表示自己还不熟悉Lightroom中的污点去除功能,使用起来还有点难度,为此,今天小编专门分享了关于Lightroom污点去除功能使用教程,一起来看看吧。
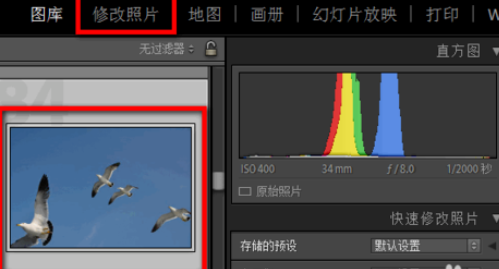
首先打开Lightroom,在图库中选择照片,然后点击修改照片。
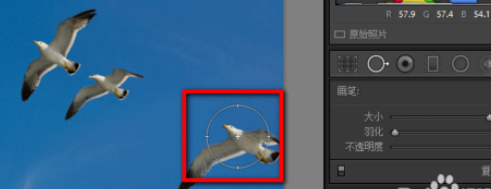
选择污点去除工具,选择仿制或者修复。
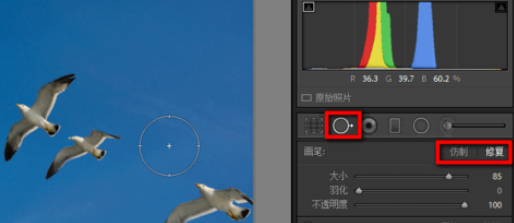
设置污点去除的画笔大小、羽化和不透明度。

使用Lightroom污点去除工具在想去除的地方单击。
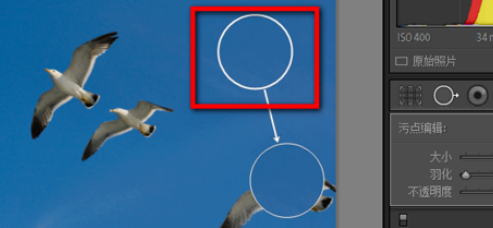
拖动圆圈到其它地点覆盖想要去除的地方。
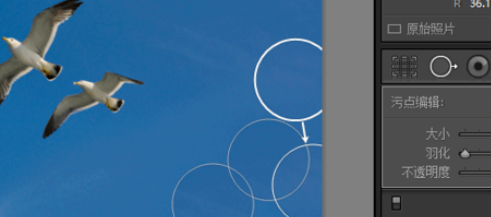
多次用污点去除工具将照片中不想要的部分去除就ok了。
各位小伙伴们,看完上面的精彩内容,都清楚Lightroom污点去除功能使用操作内容吧!
 超凡先锋
超凡先锋 途游五子棋
途游五子棋 超级玛丽
超级玛丽 口袋妖怪绿宝石
 地牢求生
地牢求生 原神
原神 凹凸世界
凹凸世界 热血江湖
热血江湖 王牌战争
王牌战争 荒岛求生
荒岛求生 植物大战僵尸无尽版
 第五人格
第五人格 香肠派对
香肠派对 问道2手游
问道2手游