
很多人在办公中都在使用Adobe PhotoShop CS6软件,那么你们知道Adobe PhotoShop CS6如何使用写字功能吗?接着,小编就为各位带来了Adobe PhotoShop CS6使用写字功能的具体操作,感兴趣的用户快来下文看看吧。
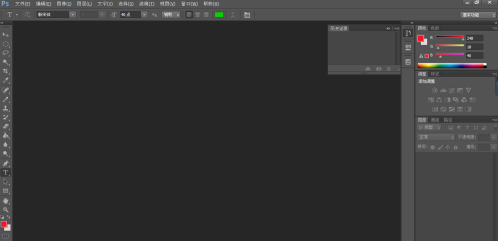
第一步首先打开Adobe Photoshop CS6软件
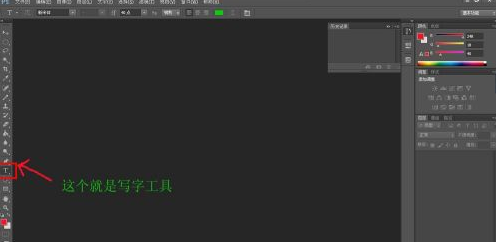
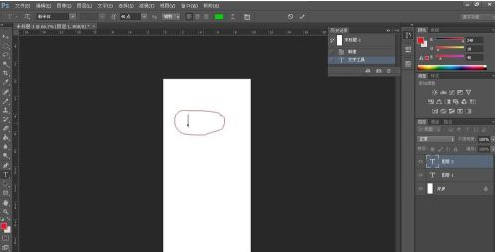
第二步左键点击横排文字工具(也就是写字工具)位于操作界面的左侧工具栏有点像T的那个图标
第三步移动鼠标到你需要打字的地方点击左键 这时就会出现一条竖线
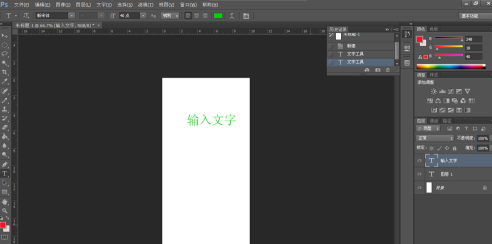
第四步输入你需要书写的文字就可以了
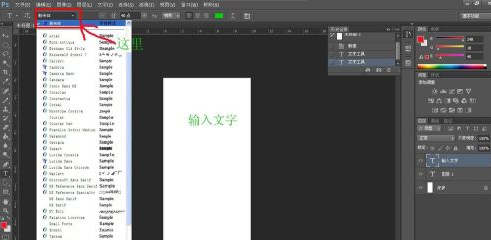
第五步这时屏幕的上方还有一行工具栏 在这里第一项是调节文字字体 上下拉动可以选择你喜欢的字体
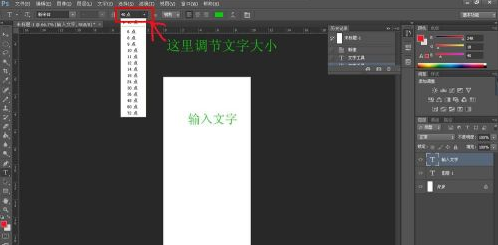
第六步往左第二项 有个长的像双T的 可以调节文字的大小
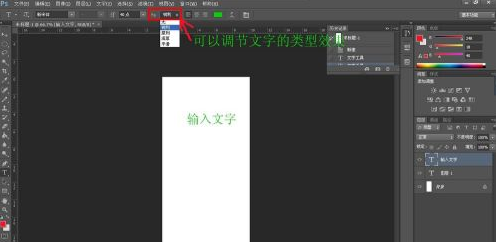
第七步左第三项 双可以调节文字的类型效果
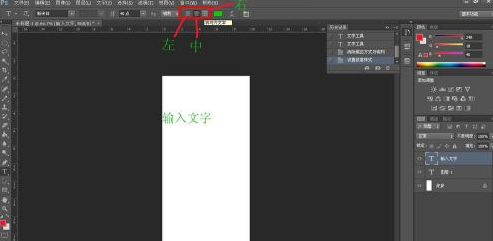
第八步左第四项 那三个图标依次分别是把自己左对齐 居中 右对齐
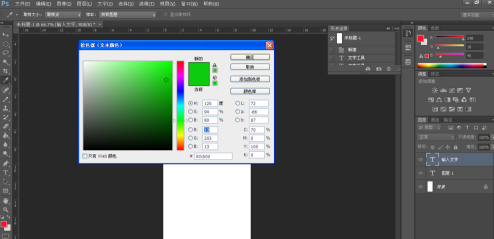
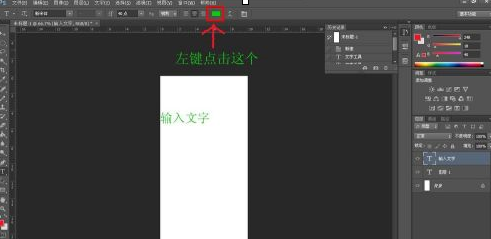
第九步 左边第五项 可以随意的变换字体的颜色 点击左五图标 出现一个调色板 点击想要的颜色按确认键
好了现在大家就可以随意的使用Adobe Photoshop CS6写出自己想要的文字了。
以上就是小编给大家带来的Adobe PhotoShop CS6使用写字功能的具体操作,希望本文内容能帮助到大家!
 超凡先锋
超凡先锋 途游五子棋
途游五子棋 超级玛丽
超级玛丽 口袋妖怪绿宝石
 地牢求生
地牢求生 原神
原神 凹凸世界
凹凸世界 热血江湖
热血江湖 王牌战争
王牌战争 荒岛求生
荒岛求生 植物大战僵尸无尽版
 第五人格
第五人格 香肠派对
香肠派对 问道2手游
问道2手游